Data Organization on PATCH|Lab PMACS
This document describes how to organize data for 3D reconstruction on the PMACS cluster. We will demonstrate the scripts with a specific case HNL-56-21 here. During this data organization stage, we will be populating the data in the input directory of the project.
Understanding the directory structure
At the root of your directory tree, create the following directories:
input                    : Input MRI, blockface, and histology data organized here
manifest                 : Manifest files summarizing the data/parameters
manual                   : Manual steps are performed here
scripts                  : The current repository
work                     : All the work directories are created here
Checking Input Files for Specimen
This script is very useful to check what remains to be done for a specimen:
./recon.sh check_specimen_inputs HNL-56-21
It will list required input files that have been found and the ones that are missing. Everything should be green before proceeding!
Preparing the 7T MRI
Perform the 3D printing process. Molds files are currently stored on PennBox in folder
UCLM-Share/MTL Molds/<specimen>. For molds that were printed using a dedicated 7T MTL scan, the following files will be required:mtl7t.nii.gz contour_image.nii.gz slitmold.nii.gz holderrotation.mat
Update the file
$ROOT/manifest/moldmri_src.txt. The file looks like this:HNL-52-19 mold01 ASL 0 HNL-53-19 mold01 ASL 0 HNL-54-20 mold01 ASL 1 HNL-56-21 box ASL 1
For now, don’t worry about the
ASLand1fields. This will be edited later. Just add the specimen ID and if you want it coped from box, butboxin the second field.Obtain Box.com developer token from this link: https://upenn.app.box.com/developers/console and assign to an environment variable:
export BOX_DEVELOPER_TOKEN=fi3AmT2BGR6bygddAoCxi0jIbSVUvmYS
Run this command to sync the relevant files from Box:
./copy_input.sh copy_mold_mri HNL-56-21
Preparing the 9.4T MRI
High-resolution MRI scans are on FlyWheel. Navigate to FlyWheel (upenn.flywheel.io) and locate the correct scan.
Edit the file
$ROOT/manifest/hiresmri_src.csv, adding an entry that includes the FlyWheel subject id, session id, acquisition id, and NIFTI filename.HNL-52-19,cfn/pmc_exvivo/HNL_52_19R/9.4TMTL2ndRpt_HNL_52_19R_20201020/110001 - 2020-10-19 16_52_12/files/MSME_110001.nii.gz HNL-53-19,cfn/pmc_exvivo/HNL_53_19L/9.4TMTL_HNL_53_19L_20201007/80001 - 2020-10-07 17_16_29/files/MSME_80001.nii.gz HNL-54-20,cfn/pmc_exvivo/HNL_54_20L/9.4TMTLRpt_HNL_54_20L_20201014/120001 - 2020-10-14 15_57_36/files/MSME_120001.nii.gz HNL-56-21,cfn/pmc_exvivo/HNL5621/9TMTLx20211005/80001 - 2021-10-05 17_02_50/files/MSME_80001.nii.gz
IMPORTANT Older entries in this file need to be updated with new FlyWheel naming convention
Run
./copy_input.sh copy_hires_mri HNL-56-21
Preparing the blockface images
Blockface photograph images are .jpg files are around 3000x4000 pixels in size, sampled at 500µm intervals, and look like this:
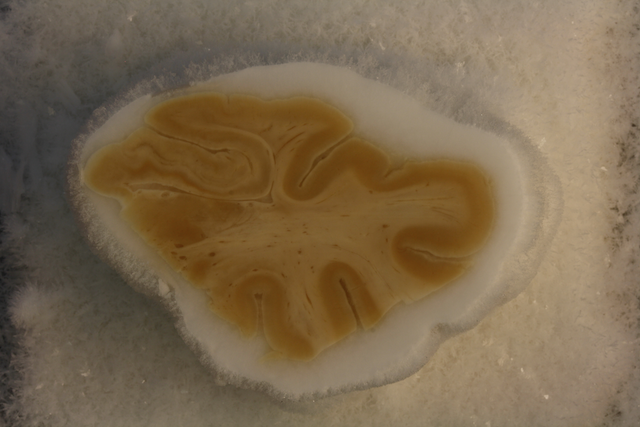
Blockface images are placed in the Box folder (UCLM-Share/UCLM Scans--Blockface Images). These files need to be cleaned up (consistent naming) and copied to GCS for feature extraction in the cloud. This requires several steps:
Import from Box to a temporary folder
Inspect files
Import from temporary folder to GCS
Perform feature extraction
Import extracted features for reconstruction
Importing blockface images from Box
Edit the file $ROOT/manifest/blockface_src.txt. The file looks like shown below. Add the new specimen and the names of the blocks (these can be looked up in the Box folder)
HNL-52-19 HR1a HR2a HR3a HR4p
HNL-53-19 HR1a HR2a HR3a HR4p
HNL-54-20 HL1a HL2a HL3a HL4p
HNL-56-21 HL1a HL2p HL3a HL4p
Run
./copy_input.sh -d import_blockface_from_box HNL-56-21
This will create a folder $ROOT/tmp/blockface_import/HNL-56-21 with files organized as they will be on GCP. There should be a raw_bf folder with the files and a manifest folder with a listing of slides.
Inspect imported files
Make sure that the specimen is named correctly. For INDD, make sure that the INDDID and UP match. It is a lot harder to fix issues once files are uploaded to GCP.
Upload blockface images to GCS
Run
./copy_input.sh -d export_blockface_to_gcs HNL-56-21
Confirm that the files are in correct location in the gs://mtl_histology bucket and then delete the $ROOT/tmp/blockface_import/HNL-56-21 folder.
Perform feature extraction
To extract features from the blockface images, the following command is used:
./svs_to_cloud.sh blockface_multichannel_all [-D] [-F] [regex]
It is recommended to first run this with the -D (dry run) flag. For example:
./svs_to_cloud.sh blockface_multichannel_all -D HNL-56-21
This will generate .yaml files in the temp directory that can be launched individually using kubectl. It is a good idea to run one of these commands to make sure it completes before scheduling the whole batch. For example:
kubectl apply -f /tmp/density_43ac6c.yaml
You should see output job.batch/bf-mchan-job-1e76bf created after running the command.
You can monitor the job with the commands below:
# Get job status
kubectl get jobs bf-mchan-job-1e76bf

# Get status of the pod created for the job
kubectl get pods -l job-name=bf-mchan-job-1e76bf

# Get logs from the pod (once container has been created)
kubectl logs -l job-name=bf-mchan-job-1e76bf
Once you are sure that everything looks good, run the command for all slides, without the -D flag:
./svs_to_cloud.sh blockface_multichannel_all HNL-56-21
You can check the status of all jobs launched using this command
kubectl get jobs | grep bf-mchan-job
After completion, the folders gs://mtl_histology/HNL-56-21/bf_proc/ should be populated with files generated by the deepcluster algorithm.
Import extracted features for reconstruction
Finally, after the jobs have completed, we need to copy the results back to PMACS. This is done using the command:
./svs_to_cloud.sh rsync_bf_proc_all HNL-56-21
The files will be copied over to folder $ROOT/input/HNL-56-21/bf_proc and ready for use.
Preparing Histology
This is the most time-consuming step. Histology preparation includes running WildCat and DeepCluster pipelines on the whole-slide images in GCP and copying back to PMACS.
The commands use the script svs_to_cloud.sh. The sequence of steps for preparing histology for a new specimen is:
Update the
HistologyMatchingGDrive spreadsheet with the help ofcheck_for_new_slides_allcommand as described here.Update local manifests using
update_histo_match_manifest_allcommand as described here.Generate feature maps for NISSL slides using the DeepCluster algorithm by running
nissl_multichannel_allas described here.For each histology stain and Wildcat model, run the
density_map_allcommand to generate whole-slide density maps, as described hereLastly, copy all the images computed by GCP to PMACS using the
rsync_histo_allcommand, as described here.